
Why Blown-In Insulation Problems Develop
Insulation slows heat flow, but it doesn’t stop moving air. Performance depends on material, installed depth, air leakage, and moisture conditions. A deep layer over a leaky ceiling still wastes heat. Installation quality matters just as much as the product itself. Not every cold room points to a failing insulation layer. Leaky ducts, old windows, and undersized heating systems create similar symptoms. Piling on more insulation won’t fix problems that start somewhere else. A proper diagnosis should come before any repair or upgrade. Crawl spaces carry different moisture risks than attics, so they need different plans. Crawl space insulation contractors often start with ground moisture before choosing materials. Kansas homes handle hot summers, cold winters, and big seasonal swings. Warm indoor air leaks upward through ceiling gaps during cold weather. Well-planned blown-in insulation starts by controlling that airflow.Common Blown-In Insulation Problems and Their Causes
Uneven Coverage and Thin Spots
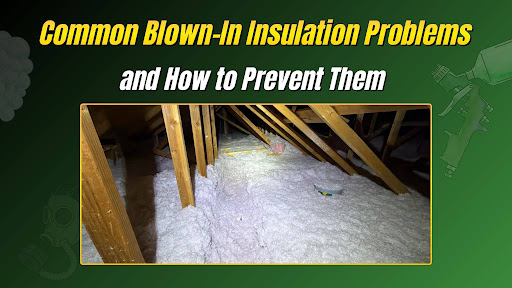
Blowing machines can leave low areas near eaves and corners. Attic hatches, chimney chases, and wiring paths often get missed too. Thin spots let heat escape faster than the surrounding insulation does. Homeowners can spot gaps from the attic hatch with a flashlight. Stay on the ladder, and never step on the ceiling drywall.Settling and Loss of Insulation Depth
Loose-fill materials can settle over time, which lowers installed depth. Some settling is normal, and installers should account for it. Compare today’s depth with the installer’s written target when possible. Large dips, exposed ceiling joists, or compacted patches suggest a bigger defect. Remember that R-value per inch differs from total installed R-value. Total R-value depends on both the material and its final depth. Cellulose and fiberglass perform differently, so each needs its own target depth.Moisture, Mold, and Damp Insulation
Roof leaks, bath fans venting into attics, and condensation can dampen insulation. Warning signs include stains, musty smells, and compressed or clumped material. Not all blown-in insulation develops mold, but wet material needs attention. You cannot solve the problem of a leaky roof or a misdirected exhaust duct by installing insulation. For that, you have to first solve the issue of water leakage.Air Leaks and Poor Attic Air Sealing
Insulation resists heat flow, yet moving air can bypass it. Common leak points include recessed lights, plumbing stacks, and top plates. Gaps around chimneys and attic hatches also let conditioned air escape. ENERGY STAR notes that EPA recommends air sealing before adding attic insulation. Sealing first also stops insulation from hiding leaks that need repair.Blocked Vents and Unsafe Installation Areas
Loose-fill insulation can drift over soffit vents and choke attic airflow. Baffles or rafter vents keep the ventilation path clear and open. Follow manufacturer and local code guidance for clearances around flues, chimneys, and fixtures. Installers should use barriers to hold insulation back from those areas. This table summarizes each problem, its cause, and its fix.| Problem | Likely Cause | Warning Sign | Prevention |
| Thin spots | Missed areas, uneven blowing | Visible joists, cold rooms | Depth markers, final inspection |
| Settling | Compression, low starting depth | Dips, lower depth than before | Install to target depth |
| Moisture | Roof leaks, fan exhaust, condensation | Stains, musty odor, clumping | Fix source, vent fans outdoors |
| Air leaks | Unsealed gaps and penetrations | Drafts, dust trails, uneven rooms | Seal before insulating |
| Blocked vents | Missing baffles at eaves | Insulation touching roof deck | Install baffles |
How to Prevent Blown-In Insulation Problems
Prevention starts well before any insulation arrives in the attic. Air sealing, moisture control, and ventilation should always come first. Those steps protect the insulation and help it perform as rated. Homeowners planning blown-in insulation in Kansas should also confirm the target depth. Ask for the material type, R-value goal, and installed inches in writing. Bath fans should vent outdoors, not into the attic. Roof repairs should be finished before any new material goes down. Schedule a walkthrough on completion day, and photograph the depth markers. Those photos create a useful record if questions come up later. Use this checklist to review finished insulation work before final payment.- Depth markers show the agreed inches across the whole attic.
- Soffit vents stay clear, with baffles installed at each rafter bay.
- Air sealing was completed around penetrations, hatches, and recessed lights.
- Barriers keep insulation away from flues, chimneys, and heat-producing fixtures.
- Bath fans vent outdoors, and no damp insulation was left behind.
- The crew removed debris and left a written depth record.
How to Inspect Existing Blown-In Insulation Safely
Start from the attic hatch with a flashlight and a ruler. Look for bare spots, dark stains, flattened areas, and visible wiring. ENERGY STAR says evenly spread insulation covering the joists probably means you have enough. Measure depth in several places, since coverage often varies across attics. Treat these observations as clues, not proof of insulation failure. Depth measurements help when rooms feel colder than they once did. Moisture meters and thermal imaging can reveal hidden damp spots or missing insulation. Never step on drywall, because ceilings can’t support a person’s weight. Don’t disturb loose, pebble-like material or damaged wiring you find. Some older attics contain vermiculite, which EPA’s vermiculite guidance says to treat as asbestos-containing. Call an insulation company that residents trust about hidden damage or widespread thin coverage. An energy assessment can pinpoint leaks, depth issues, and safety hazards.When to Repair, Add, or Remove Existing Insulation
Minor problems like low corners or small gaps often need simple corrections. Crews can rake loose-fill into place or top off thin areas. Adding insulation makes sense once leaks and moisture sources are fixed. New material can differ from the old, but the old must be sound. Damp, moldy, contaminated, or rodent-soiled insulation usually calls for removal. Professional insulation removal also needs protective gear and safe disposal. Some attics need removal, air sealing, and attic spray foam upgrades afterward. Spray foam insulation contractors can advise when replacement beats repair. A careful inspection shows which path fits your particular attic best. Hidden damage may only appear after crews pull back the top layer.Choosing a Pro for Blown-in Insulation in Kansas
A good installer explains the plan before touching the attic. Any insulation company that homeowners hire should inspect before quoting. Ask about these items before you sign any written agreement.- Which material, what target R-value, and how many installed inches?
- How the crew will seal air leaks before adding insulation.
- How baffles and ventilation paths stay protected during the installation.
- What cleanup, debris removal, and the final inspection will include.
- Whether old damaged material needs removal before new work begins.
Protect Your Home with the Right Insulation Solution
Proper installation, moisture control, air sealing, and inspections protect any attic. Blown-in insulation in Kansas performs best when those basics come first. Talk with Advanced Seal Spray Foam Insulation about your insulation concerns. Request an assessment that fits your home and the problems you’ve noticed.FAQs
Q1. Why Is My Blown-In Insulation Not Keeping My Home Warm?
Common causes include thin coverage, air leaks around the ceiling, settled material, and moisture. Ducts, windows, or heating equipment may also be responsible. An inspection of depth, sealing, and moisture sources can show where heat is actually escaping.
Q2. How Can I Tell Whether Blown-In Insulation Has Settled?
Look for lower depth than before, visible ceiling joists, or dips and flattened patches. Measure depth in several spots with a ruler and compare it to the installer’s target. Some settling is normal, so large differences deserve a look.
Q3. Can Blown-In Insulation Become Damaged by Moisture?
Yes, wet insulation can compress, lose performance, and support mold growth. Fixing the source comes first, whether that’s a roof leak, bath fan exhaust, or condensation. Dry, undamaged material may stay, but damaged material usually needs professional removal.
Q4. Should I Add More Insulation Over the Existing Material?
Adding more can help when existing material is dry, sound, and thin. Seal air leaks first, and fix any moisture problem. Have damaged, contaminated, or unknown older material inspected before covering it, because new insulation can hide problems.
Q5. When Should Blown-In Insulation Be Removed or Replaced?
Consider professional assessment when insulation is wet, moldy, contaminated, or soiled by pests. Leave suspected vermiculite undisturbed until a specialist evaluates it. Widespread compaction or heavy damage may also justify replacement after the source of damage is corrected.